
How To Clean Pull Down Faucet’s Aerator? (Step-By-Step)
So your aerator needs cleaning but you aren’t sure how to do it properly and without harming the aerator? You have wondered to the right place. You likely have at some point noticed the screen-like part in your faucet’s head and probably thought nothing much of it. However, the fact that you came to this post looking for an answer indicates that maybe you have thought about it recently, and your faucet isn’t working as it used to.
In this article, I will go in-depth not only on how to clean a pull-down faucet‘s aerator, but you will also learn much more about them. But first, let’s get the answer you are looking for!
Contents
- How To Clean Pull Down Faucet Aerator
- What Is A Faucet Aerator
- What Does Aerator Do For Faucet
- Can You Use A Faucet Without Aerator
- How Do You Remove A Hidden Aerator Without A Tool
- How Often Should You Change Faucet Aerators
- How Much Does An Average Aerator Cost
- How Do You Clean A Faucet Head With Baking Soda
- Summary
- Here You’ll Find My Favorite Kitchen Equipment.
How To Clean Pull Down Faucet Aerator
1. Remove Spray Head
The first step in cleaning the aerator is to make it easy, therefore screw the spray head from the hose counterclockwise. If you can’t screw the spray head make a knot out of the hose so it won’t constantly get pulled up.
2. Remove Aerator
In this step, you should have a firm hold of the spray head. Now, locate the aerator and remove it by following these steps. First, if you have an easy-to-remove aerator you can simply turn it counterclockwise and get it off. Also, check the pull-down faucets manual if it came with an aerator removing tool.
If you have a hidden aerator then it’s more tricky. Try to turn the aerator counterclockwise with your fingernails until it loosens up. And if this doesn’t work for you, then try using a small wrench or flathead screwdriver to get them off completely. P.S if you had a removable spray head the aerator could be hidden inside there so be sure the check that out. Also, rinse the spray head part carefully with water at this point, it could help to get fore water pressure!
3. Rinse Aerator
Now that you have removed the aerator simply rinse it with water and give it a little scrub so there’s no more dirt left. The actual cleaning part is as simple as this.
4. Replace Aerator
Now the hardest part is certainly done and replace the aerator by going the steps backward as you get it off.
5. Replace Spray Head
If you had a removable spray head screw it back on and you’re now finished. Give the faucet a test and it should be flowing much more smoothly.
Hopefully, you got the job done without too much frustration and hassle because believe me, it really can be both of those things.
What Is A Faucet Aerator
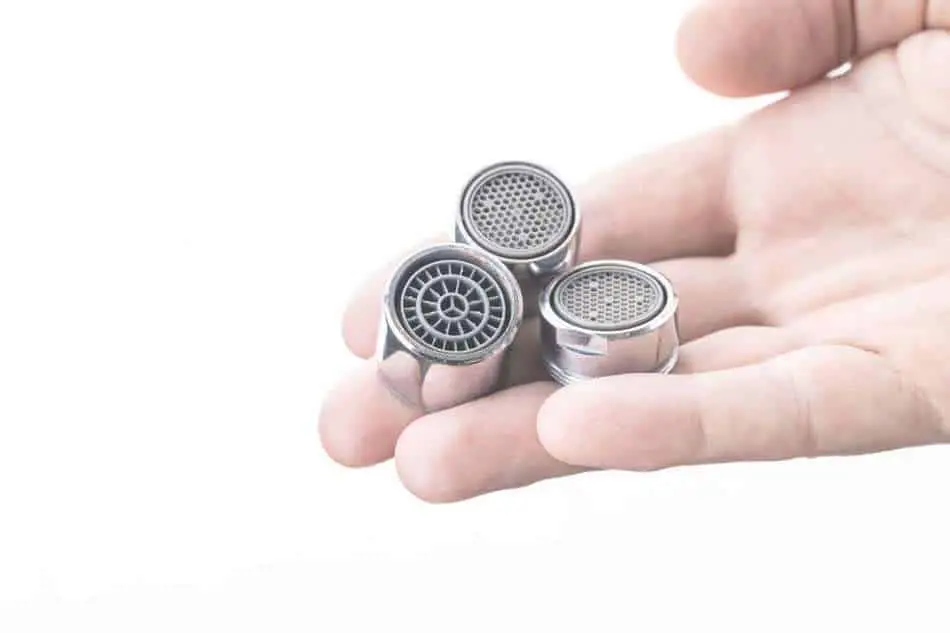
The faucet aerator is the small screen on the tip of your faucet. There are different kinds and some aerators get removed easily from the faucet heads and others well… Are a little harder to remove to say the leasts.
What Does Aerator Do For Faucet
The aerator has many benefits on the faucet’s function and if you haven’t ever seen a faucet working without an aerator, you would be really surprised at the difference that it makes.
First, an aerator’s main function is to reduce the water volume from the faucet. This will affect in lower splash radius when the water hits your sink. If you look closely, you can see that the water doesn’t come as one big stream out of the faucet, but dozens of really small streams.
Second, as the aerator reduces the water’s volume from the faucet, that will mean that you will use a lot less water over time, without reducing home comfort but actually increasing it. With less water usage it will be seen as lower energy consumption as well!
Third, an aerator will shape your water to even, consistent flow with stable water pressure. Therefore you will get a much more enjoyable faucet usage experience.
Fourth, the aerator will actually give you more powerful water pressure despite the lesser water volume. That’s because if you use a faucet without an aerator, it will just flow out of there without any formation giving in nearly a non-existing water pressure.
Can You Use A Faucet Without Aerator
Yes, you can totally use a faucet without an aerator but aerators will give excellent perks as mentioned above. However, if your aerator is broken and your faucet is so old that it doesn’t have a replacement one in the market, then you can remain using your faucet without an aerator with no stress whatsoever.
In fact, there are a lot of people that prefer the faucet without an aerator and that’s perfectly fine. Some faucets are sold without aerators in purpose because they can have different water flowing methods which an aerator would just ruin. However, for a restaurant’s pull-down faucet an aerator is a must-have in order to rinse the supplies properly.
For example, if you would like a waterfall faucet there’s a good chance that there isn’t an aerator included. For visualization check out the video below and see what that would look like.
How Do You Remove A Hidden Aerator Without A Tool
In short, in order to remove a hidden aerator without a tool, you can use a tiny flathead screwdriver that could work, depending on the aerator. Usually, this works by placing the screwdriver’s head between the faucet and aerator to a counterclockwise angle and slightly hitting it repeatedly. This should loosen the aerator and giving you a chance to remove it.
How Often Should You Change Faucet Aerators
You should change the faucet’s aerator when you notice that the water is coming out too strong or unevenly. Also, if the water pressure is uneven and the water flows in small dozes at a time you should change it. However, before doing that, make sure that the problems aren’t caused by debris and dirt behind the aerator so it’s likely that the problem could be loved by simply cleaning the aerator. The timeframe when you should change a faucet’s aerator depends on the quality of it, usage, and the type of water used.
How Much Does An Average Aerator Cost
Depending on the quality and functions of the aerator, an average cost is between $5 – $12 so they come off really cheap. Here are a couple of examples: Cheaper Aerator – More expensive Aerator.
How Do You Clean A Faucet Head With Baking Soda
You can clean a faucet head with baking soda by mixing a small amount of water and baking soda that forms a paste. After that, apply the paste to an old toothbrush and brush the faucet head with it until it’s covered in the paste. Let it sit for five minutes before rinsing thoroughly.
Summary
This concludes our educating article about aerators and I sincerely hope that you found value and help from the steps above. I’m certain that you will get your problem solved with minimum hassle so go on now and clean your aerator! However, if your pull-down faucet has seen its days you should definitely check out our Commercial-Style Faucet Recommendations!
Feel free to leave a comment below if you fixed your problem, have something else to add so others can benefit from it, or have a story to tell about your aerator experiences!
Here You’ll Find My Favorite Kitchen Equipment.
Thanks for reading this article! I hope that it brought you real value that you can benefit from in your personal life! Here is my top kitchen equipment that I seriously couldn’t live without, and I think they could ease your life as well as they do mine.
- Knife set: As a chef, I can’t stand dull, poor-quality knives without any design. My absolute favorite kitchen knife set is the Gangshan 3-Piece Knife Set. It comes with a handcrafted 8″ chef’s knife and a 3.5″ paring knife. What I love even more than these flawless knives is the walnut knife block which is incredible and unique.
- Skillet: In addition to knives and my unwillingness to bargain with its quality is the cookware. My favorite skillet is Le Creuset Enameled Cast Iron Skillet. This particular skillet is 9″ in size, it is heavy, it gets very hot, which is what is required to get a good sear, and it is just beautiful, as are all Le Creuset products. Le Creuset doesn’t need an introduction as a brand, as it is one of the world’s rated brands.
- Food processor: I remember when I hadn’t a food processor at home. It wasn’t easy! But now, when I use my Ninja BN601 Food Processor, I can make anything super fast, which saves me many hours per week. This food processor has 1000 watts of power and four options, including chopping, slicing, dough, and purees. I also like the middle-sized 9cup (2.1l) bowl as it is big enough yet not too big to look unfitting in my kitchen.
- Tweezers: Dalstrong Professional Cooking Tweezers are like tongs but much more elegant, thin, and easy to use. They are great for virtually anything, but flipping, turning, and grabbing with them is easy and makes cooking much more fun! These Dalstrgon tongs are titanium coated and very durable. Also, I like the black color instead of the everyday steel.